Update your profile, subject, timezone, and time format
Configure your teaching profile with your subject, timezone, time format preferences, and personal details.
Update your profile, subject, timezone, and time format
Your profile settings control how Teeachie displays times, handles scheduling, and presents you to students. This guide shows you how to configure these essential settings.
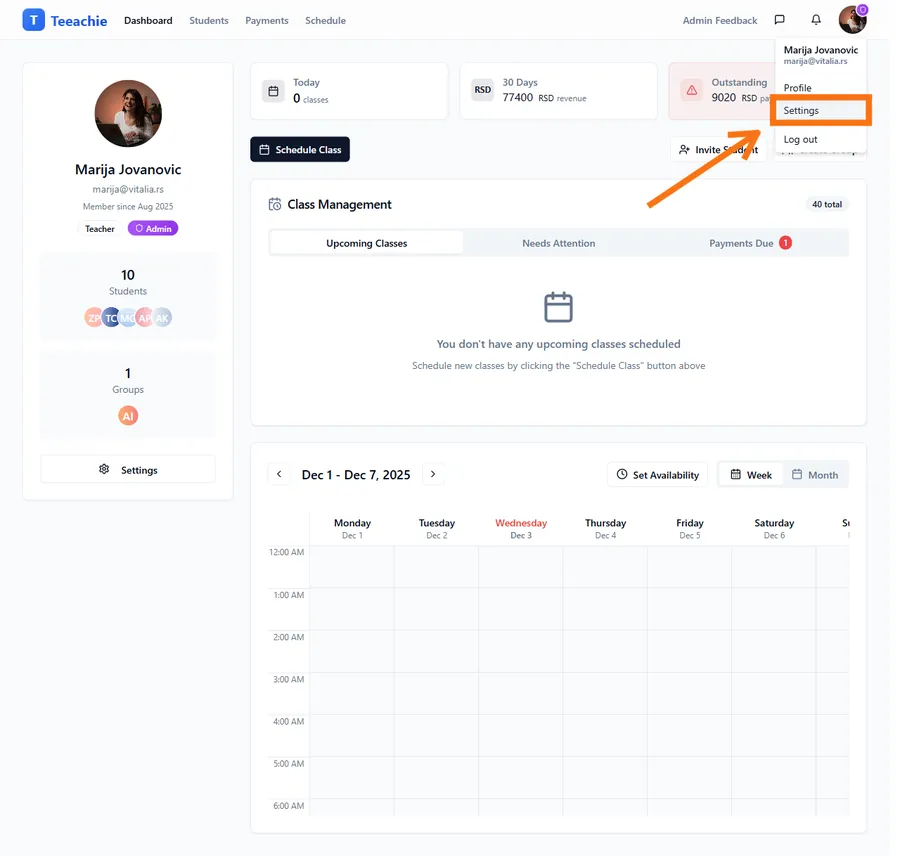
Access your settings
- Click your avatar in the top right corner of your dashboard
- Select Settings from the dropdown menu
Set your teaching subject
Your teaching subject appears on your profile and helps organize your students.
- In Profile Settings, find the Teaching Subject field
- Enter your teaching subject (e.g., English, Math, Chemistry)
- Click Save Changes
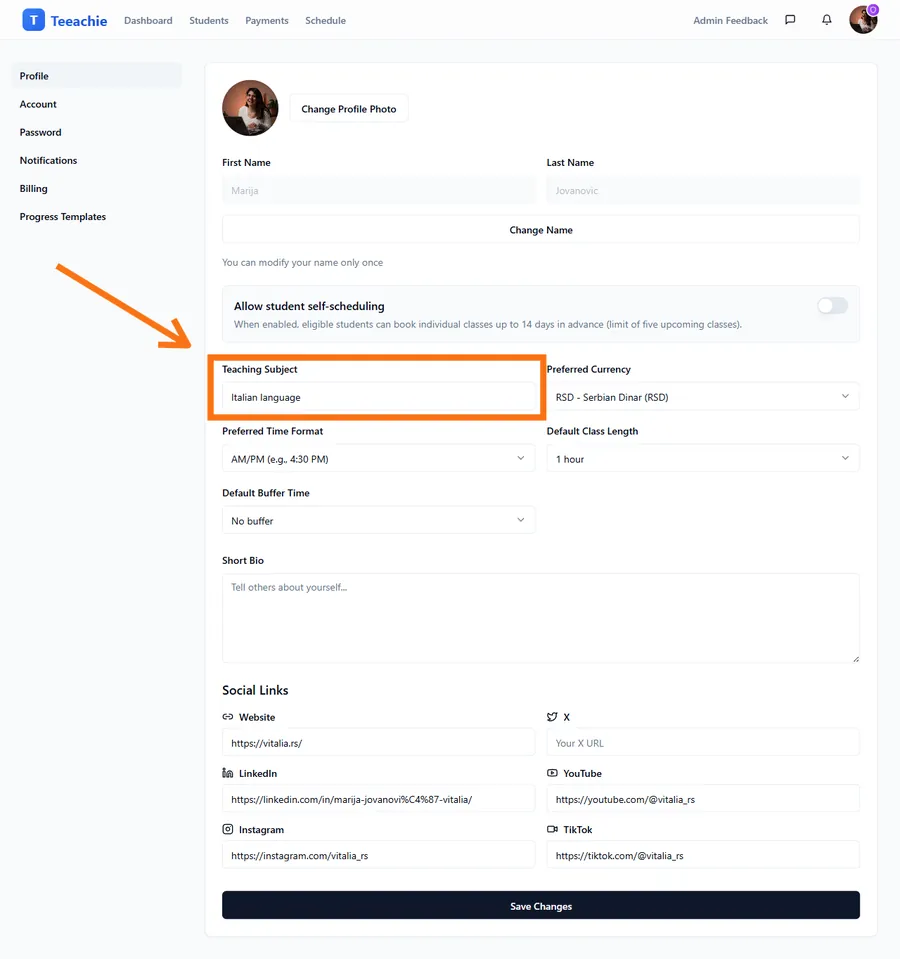
Tip: You can enter any subject you teach - this is a free text field.
Configure your timezone
Your timezone ensures that class times display correctly for you and convert properly for students in different locations.
- Go to Account Settings (separate tab from Profile Settings)
- Find the Timezone dropdown
- Select your local timezone
- Changes save automatically
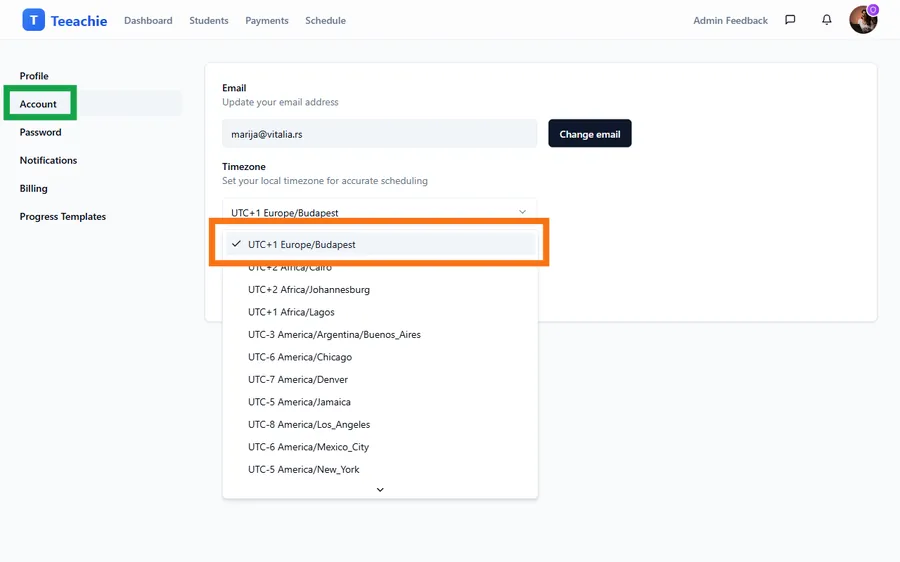
Important:
- All times in Teeachie are shown in your selected timezone
- When you schedule a class, students see it converted to their timezone
- If you travel, update your timezone to keep schedules accurate
Choose your time format
Select whether you prefer 12-hour (AM/PM) or 24-hour time format.
- Find the Time Format option in Settings
- Choose:
- 12-hour – Shows times like 2:00 PM
- 24-hour – Shows times like 14:00
- Click Save Changes
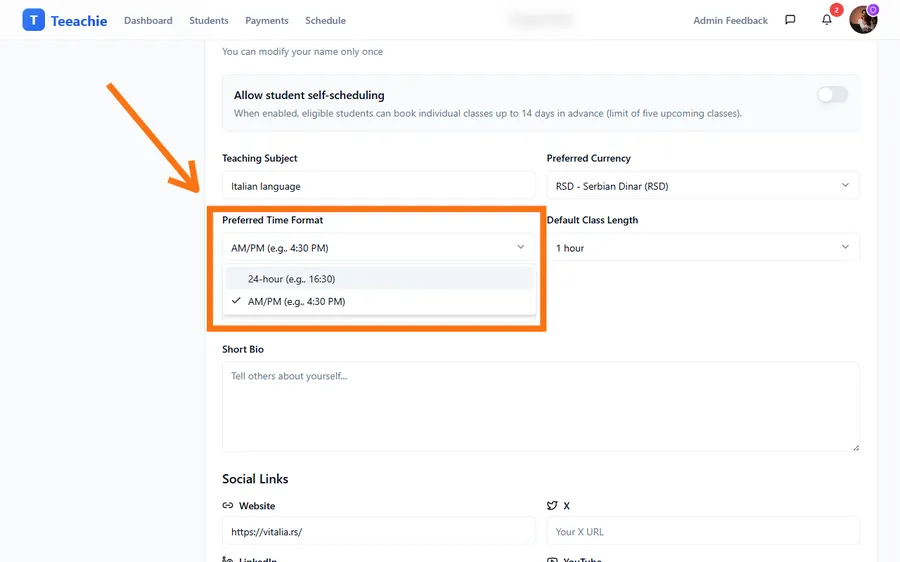
This affects how times appear throughout Teeachie, including:
- Your calendar
- Class schedules
- Availability settings
Update your personal details
You can also update your name and other profile information:
- In Settings, find the Profile section
- Update your First Name and Last Name if needed
- Add an About Me description (optional)
- Click Save Changes
Your name appears to students when they view their classes and receive messages from you.
Update your avatar
Your avatar appears throughout Teeachie and helps students recognize you:
- In Profile Settings, find your current avatar
- Click Change Profile Photo
- Select an image from your computer (max 5MB)
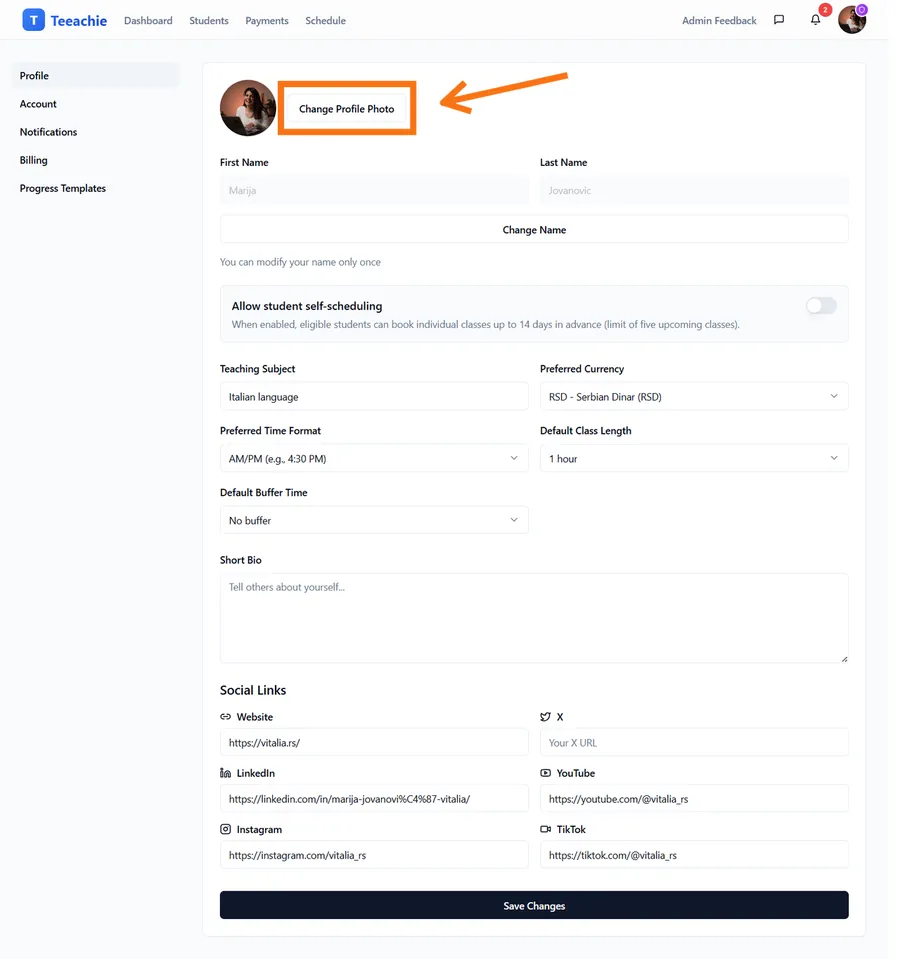
If you don’t upload a photo, Teeachie displays your initials with a colored background automatically.
Tip: A professional photo helps build rapport with students. Use a clear headshot with good lighting.
Settings summary
| Setting | What it affects |
|---|---|
| Teaching Subject | Your profile display, default for new students |
| Timezone | All time displays, calendar, scheduling |
| Time Format | How times appear (12h vs 24h) |
| First/Last Name | How students see your name |
| Avatar | Your profile picture everywhere |
| Preferred Currency | How payment amounts are displayed |
| Default Class Length | Pre-selected duration when scheduling classes |
| Buffer Time | Gap between back-to-back classes |
What’s next?
Now that your profile is set up:
- Quick start guide – Invite your first student
- Set your availability – Configure when you teach
Need help?
Having trouble with your settings? Contact support and we’ll help you out.