Quick start: Your first student and class in 5 minutes
Get up and running with Teeachie in minutes. Invite your first student, set your availability, and schedule your first class.
Quick start: Your first student and class in 5 minutes
Welcome to Teeachie! This guide walks you through the essential steps to get your first class scheduled. You’ll invite a student, set your availability, and book your first session.
What you’ll do
- Invite your first student
- Set your availability
- Schedule a class
- Add your meeting link
Let’s get started!
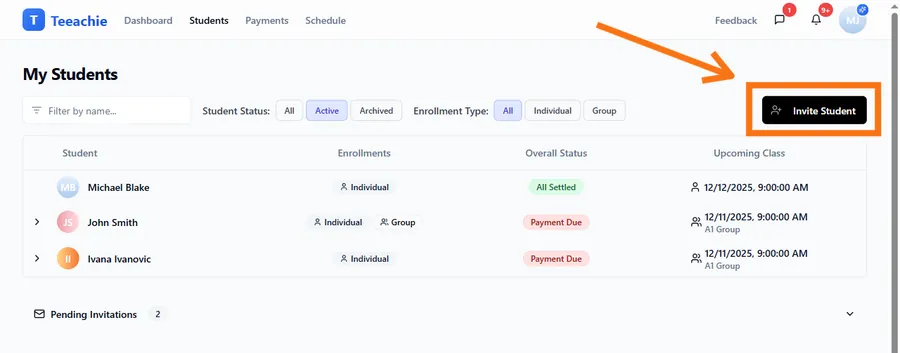
Step 1: Invite your first student
Before you can schedule classes, you need to add a student to your account.
- From your dashboard, click Students in the top navigation
- Click the Add Student button
-
Fill in your student’s details:
- First Name and Last Name – Your student’s name
- Email – Where the invitation will be sent
- Price per Class – Your rate per session (optional)
- Initial Payment – If they’ve prepaid for classes (optional)
-
Click Add & Invite Student
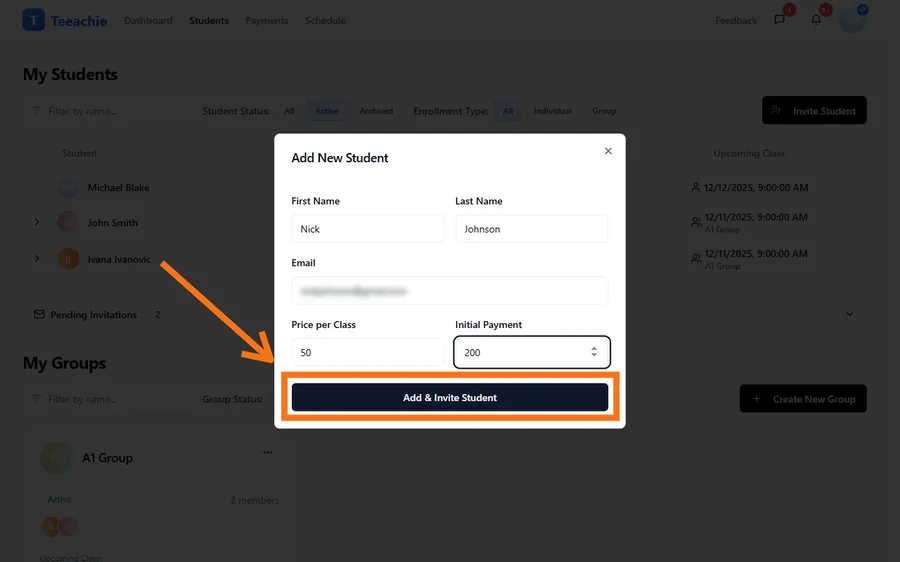
Once you add the student, you’ll see an invitation link. Share this link with your student so they can create their account and accept the invitation.
Tip: You can schedule classes for students even before they accept their invitation. The class will appear on their calendar once they create their account.
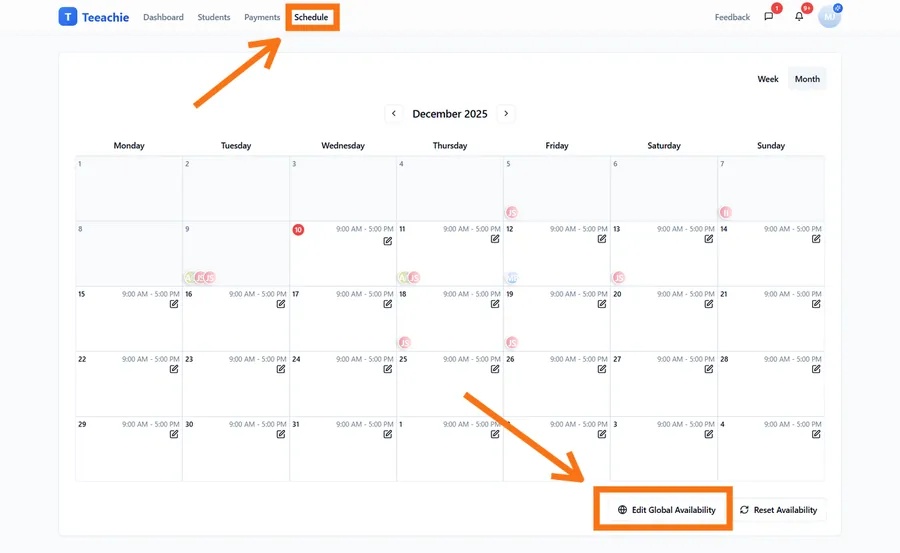
Step 2: Set your availability
Tell Teeachie when you’re available to teach so the system can help prevent scheduling conflicts.
- Click Availability in the top navigation
- Click the Edit Global Availability button at the bottom of the calendar
-
For each day you teach:
- Toggle the day on
- Set your default start and end times
-
Click Save when you’re done
Note: This sets your default teaching hours. You can configure more detailed per-day time windows later from the calendar (see the availability article).

Tip: Your availability is shown in your local timezone. Students see times converted to their timezone automatically.
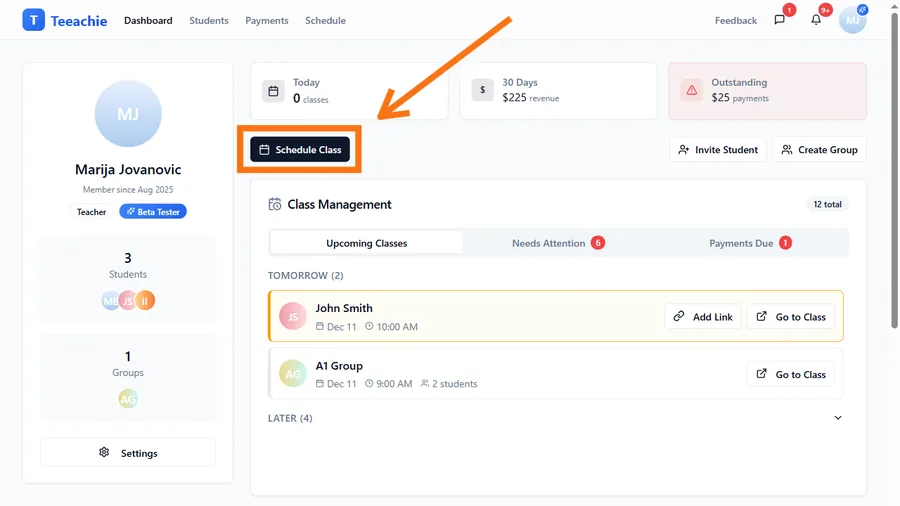
Step 3: Schedule your first class
Now let’s book a class with your student.
- From your Dashboard, find the Schedule Class button in the quick actions toolbar at the top
- Click Schedule Class to open the scheduling dialog
- Select your student from the dropdown
- Choose the class duration (e.g., 30, 45, 60, or 90 minutes)
- Pick an available date and time slot
- Click Schedule Individual Class to confirm
Alternative: You can also schedule classes directly from a student’s profile by clicking on an available time slot in their calendar.
The class now appears on both your calendar and your student’s calendar (once they accept their invitation).
Step 4: Add your meeting link
Before your class, add the video call link so your student knows where to join.
- Click on the scheduled class in your calendar, then choose Go to Class to open the Class Page
- Find the Class Link section
- Click Add Link to open the link dialog
- Paste your Zoom, Google Meet, or other video call link
- Click Save Changes
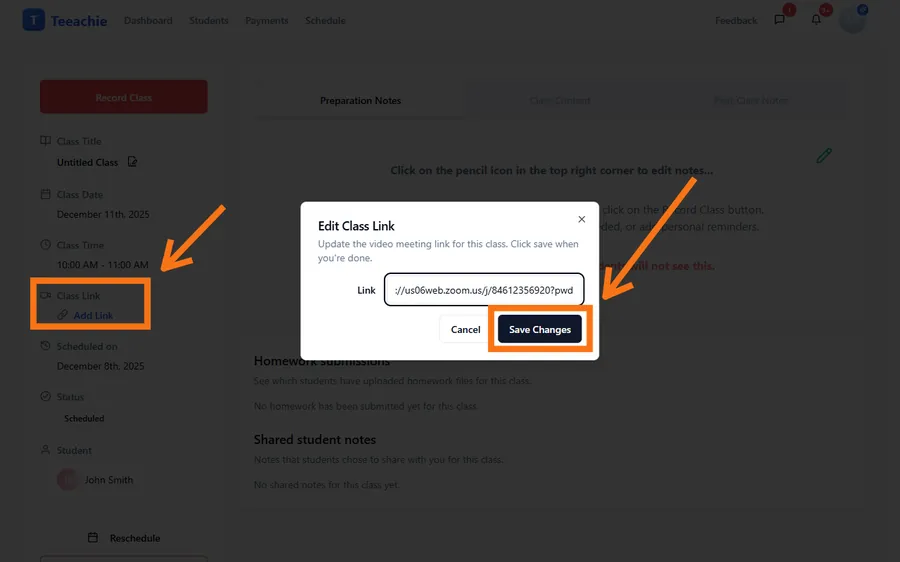
Your student will see this link when they view the class details.
You’re all set!
Congratulations! You’ve successfully:
- ✅ Invited your first student
- ✅ Set your teaching availability
- ✅ Scheduled your first class
- ✅ Added your meeting link
What’s next?
Now that you have the basics down, explore these features:
- Teeachie overview for teachers – Take a full tour of your dashboard
- Add a new student and send an invitation – Learn more about student settings
- Set your availability and working hours – Advanced availability options
- Schedule a 1:1 class with a student – More scheduling options
Need help?
If you run into any issues, check out our troubleshooting guides or contact support.