Accept an invitation and create your account
Step-by-step guide to accepting your teacher's invitation and setting up your Teeachie account.
Accept an invitation and create your account
Your teacher has invited you to Teeachie! This guide walks you through accepting the invitation and creating your account.
Step 1: Get your invitation link
Your teacher will send you an invitation link to Teeachie. This is usually shared by email or message. Look for a link that starts with:
https://teeachie.com/accept-invitation/...Can’t find it? Check your messages or ask your teacher to resend the invitation link.
Step 2: Open the invitation link
Click or tap the link your teacher sent. This opens a page showing:
- Your teacher’s information
- Details about your connection
- Option to create your account
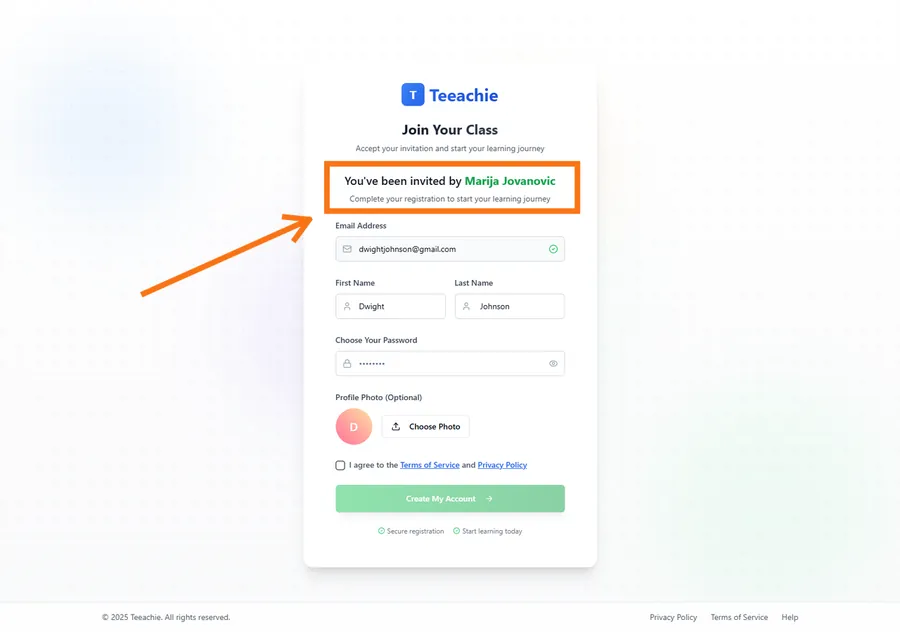
Step 3: Create your account
Fill in your details:
- Name – Your full name (may be pre-filled)
- Email – Already set from the invitation
- Password – Create a secure password
- Confirm password – Type it again
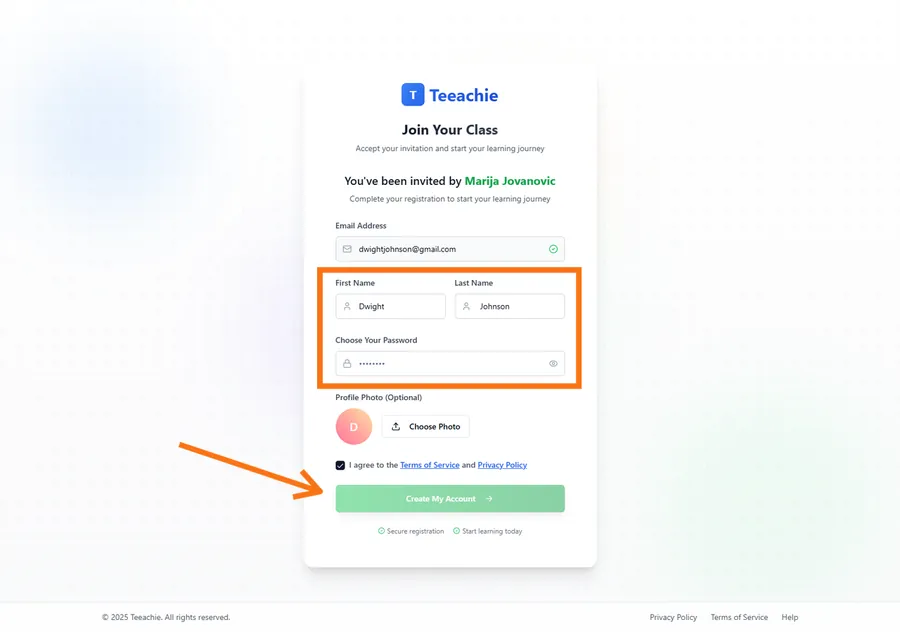
Password requirements
- At least 6 characters
- Mix of letters and numbers recommended
Step 4: Complete setup
After creating your account:
- You’re automatically signed in
- You’re connected to your teacher
- You land on your student dashboard

What’s already set up for you
Your teacher may have already:
- Set your class price and credits
- Added your language level
- Scheduled your first class
Check your dashboard to see what’s waiting for you!
Troubleshooting
”Invitation expired”
Invitations are valid for a limited time. Ask your teacher to send a new one.
”Email already in use”
You may already have an account. Try signing in instead, or use a different email.
”Invalid invitation”
The link may be incomplete. Make sure you clicked the full link from the email.
Link doesn’t work
- Try copying and pasting the full URL
- Check if your browser is blocking the page
- Ask your teacher to resend
After creating your account
Verify your timezone
Go to Settings and check your timezone is correct. This ensures class times display accurately.
Add your avatar
Personalize your profile with a photo or choose a generated avatar.
Check your first class
Look at your dashboard or calendar to see any scheduled classes.
What’s next?
- Update your profile – Set timezone and avatar
- View your classes – See what’s scheduled
- Sign in guide – For future logins
Need help?
Issues with your invitation? Contact support with your teacher’s name and email.