What your student sees when accepting an invitation
Understand the step-by-step experience your students have when accepting your invitation and creating their account.
What your student sees when accepting an invitation
Understanding what your students experience helps you guide them through the onboarding process. This guide walks through exactly what happens when a student accepts your invitation.
Step 1: Receiving the invitation link
When you invite a student, Teeachie generates a unique invitation link. You share this link with your student (via email, message, or any method you prefer).
The link looks like: teeachie.com/accept-invitation/[unique-code]
Tip: Let your students know to expect the link from you directly – Teeachie doesn’t send automated emails at this time.
Step 2: Clicking the invitation link
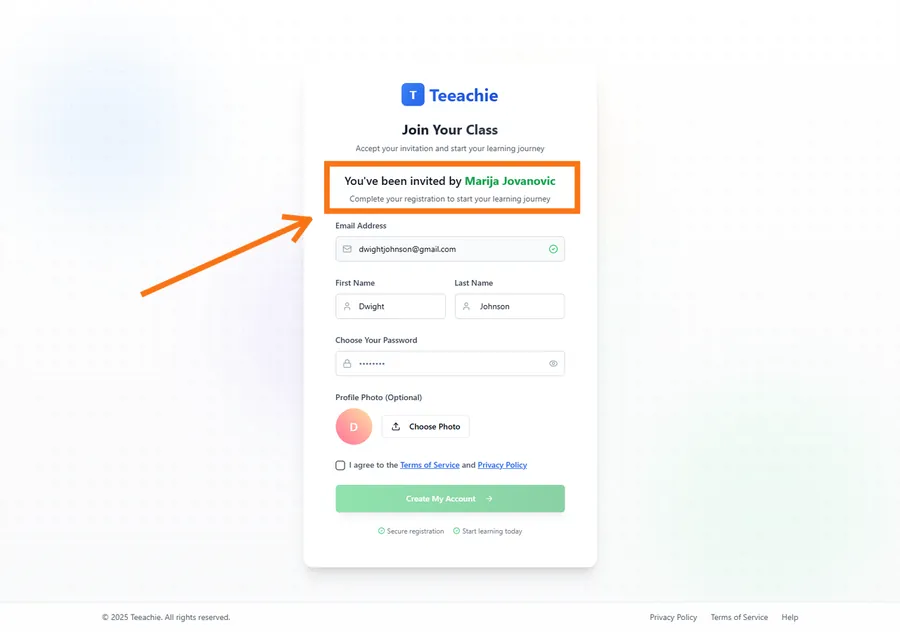
When the student clicks the invitation link, they’re taken to Teeachie’s invitation acceptance page.
This page shows:
- Your name and avatar
- The language you’ll be teaching them
- A welcome message
Step 3: Creating their account
The student fills in their details:
- Full name – Pre-filled from your invitation, but they can change it
- Email – Pre-filled and locked to the invitation email
- Password – They choose their own password
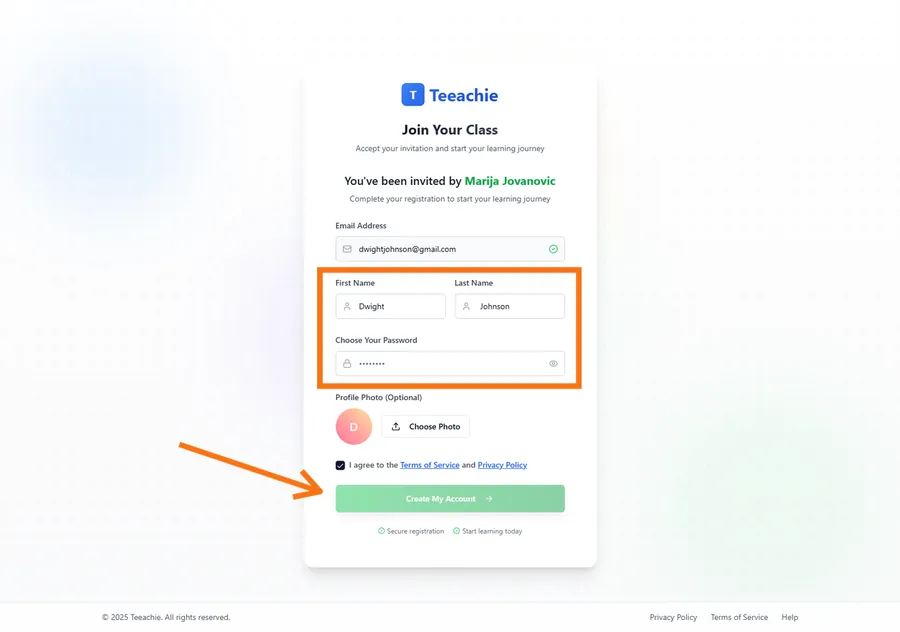
They can also optionally upload a profile photo.
They click Create My Account to continue.
Note: Students don’t need to verify their email when accepting an invitation – they’re automatically confirmed since the invitation proves email ownership.
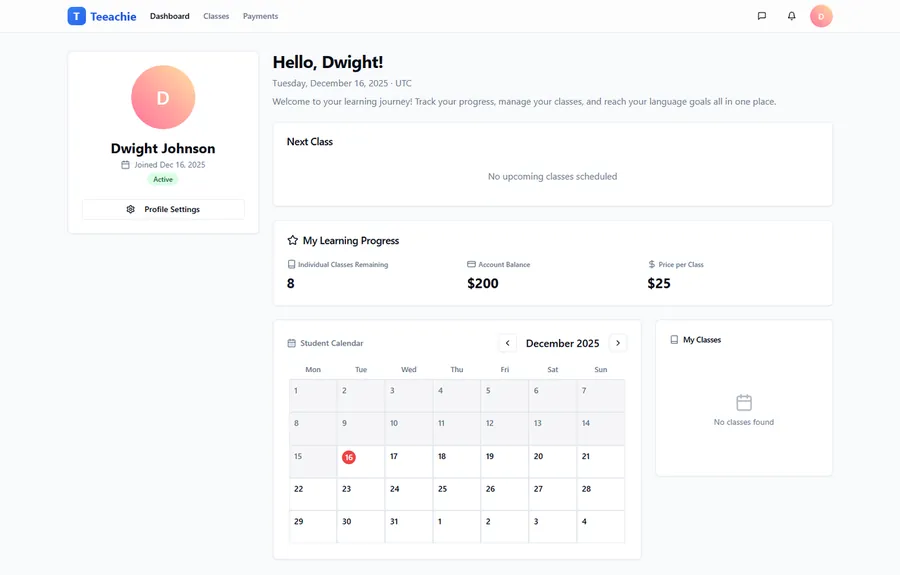
Step 4: Landing on their dashboard
After creating their account, the student is automatically signed in and taken to their dashboard.
They’ll see:
- Their upcoming classes (if you’ve scheduled any)
- Your profile as their teacher
- Navigation to access their schedule, materials, and settings
What changes for you
When a student accepts their invitation:
- Status updates – Their status changes from “Pending” to “Active” in your Students list
- Notifications – You receive a notification that they’ve joined
- Full features – You can now message them directly and they can access all class materials
Information the student sees about you
Your students can view:
- Your name and avatar
- Your teaching subject
- Classes you’ve scheduled with them
- Materials you’ve shared for their classes
- Messages you’ve sent them
They cannot see:
- Your other students
- Your revenue or payment details
- Private notes you’ve written about them
- Your availability settings
If the student already has an account
If someone accepts your invitation but already has a Teeachie account (perhaps with another teacher):
- They’ll be asked to sign in to their existing account
- Your teacher-student connection is added to their account
- They see classes from all their teachers in their dashboard
Students can have multiple teachers, and each relationship is separate.
Helping your students
Send them helpful info before they sign up
Consider messaging your students (outside Teeachie) with:
- A heads up that an invitation is coming
- Instructions to check spam if needed
- What to expect when they sign up
Share the student help guide
Point new students to the help center:
- Accept an invitation and create your account – Step-by-step for students
Answer common questions
“Do I need to download an app?” No, Teeachie works entirely in the web browser on any device.
“Is it free for students?” Yes, students never pay Teeachie – they only pay you directly for lessons.
“Can I use this on my phone?” Yes, Teeachie works on mobile browsers.
Troubleshooting student issues
Student says they didn’t receive the link
- Make sure you sent the link to the correct email or phone number
- Copy the invitation link again and resend it
- Try a different communication method if the first didn’t work
Link doesn’t work
If a link isn’t working:
- Delete the pending invitation
- Add the student again with a new invitation
Student says they already have an account
They may have signed up directly or accepted another teacher’s invitation. Have them:
- Sign in to their existing account
- Accept your invitation while signed in
Wrong name or email
If you entered incorrect information:
- Delete the pending invitation from the Students page
- Add the student again with the correct details
What’s next?
- Add a new student – Invite more students
- Schedule a class – Book sessions
- Manage invitations – Track all your invitations
Need help?
If a student is having trouble accepting their invitation, contact support and we’ll help resolve it.