Schedule a 1:1 class with a student
Book individual classes with your students, choose duration, and set up class details.
Schedule a 1:1 class with a student
Scheduling classes in Teeachie is flexible and quick. This guide shows you how to book individual sessions with your students.
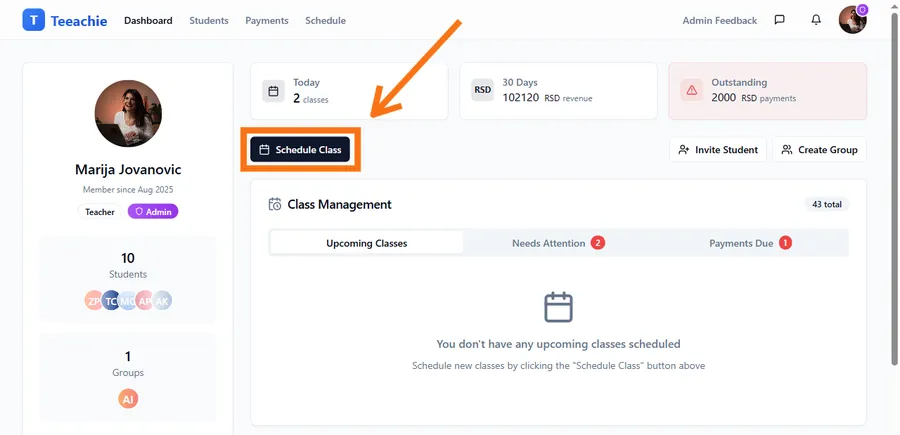
Schedule from the Dashboard
The quickest way to schedule a class:
- From your Dashboard, click the Schedule Class button
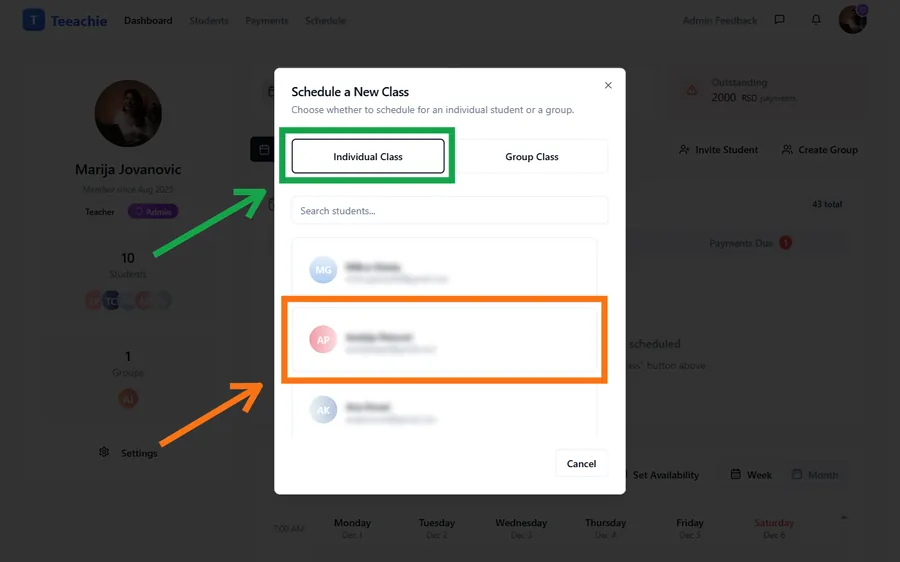
- In the dialog, choose Individual Class
- Select a student from the list (you can search by name)
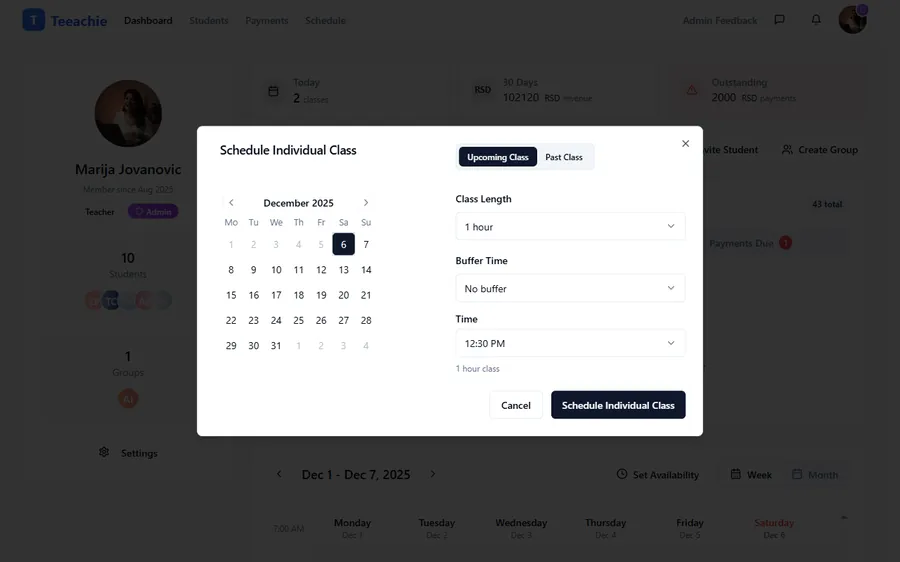
- Choose the date from the calendar
- Select the class duration (e.g., 30, 45, 60, or 90 minutes)
- Choose a time from the dropdown
- Click Schedule Individual Class
Schedule from a student profile
You can also schedule directly from a student’s profile:
- Go to Students in the top navigation
- Click on the student’s name to open their profile
- In the Overview tab, click on a day in the mini calendar
- The scheduling dialog opens with the student pre-selected
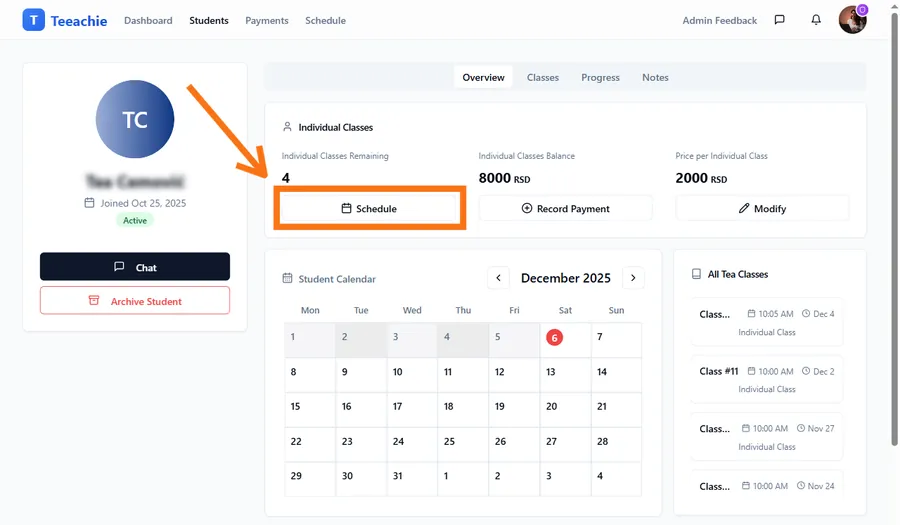
- Choose date, time, and duration
- Click Schedule Individual Class
Schedule from a group profile
To schedule an individual class with a group member:
- Go to the group’s profile page
- Click on a student’s name in the members list
- From their profile, use the mini calendar to schedule
Class duration options
Teeachie supports various class lengths. Common options include:
| Duration | Best for |
|---|---|
| 30 minutes | Quick sessions, kids, conversation practice |
| 45 minutes | Standard lessons, balanced pacing |
| 60 minutes | Comprehensive lessons, most common |
| 90 minutes | Intensive sessions, exam prep |
Other durations (75, 105, 120 minutes) are also available in the dropdown.
Tip: You can set a default class length in Settings to save time when scheduling.
Add a meeting link
After scheduling, add your video call link:
- Click on the scheduled class in the calendar, then choose Go to Class to open the class page
- Find the Class Link section
- Click Add Link to open the dialog
- Paste your Zoom, Google Meet, or other video call URL
- Click Save Changes
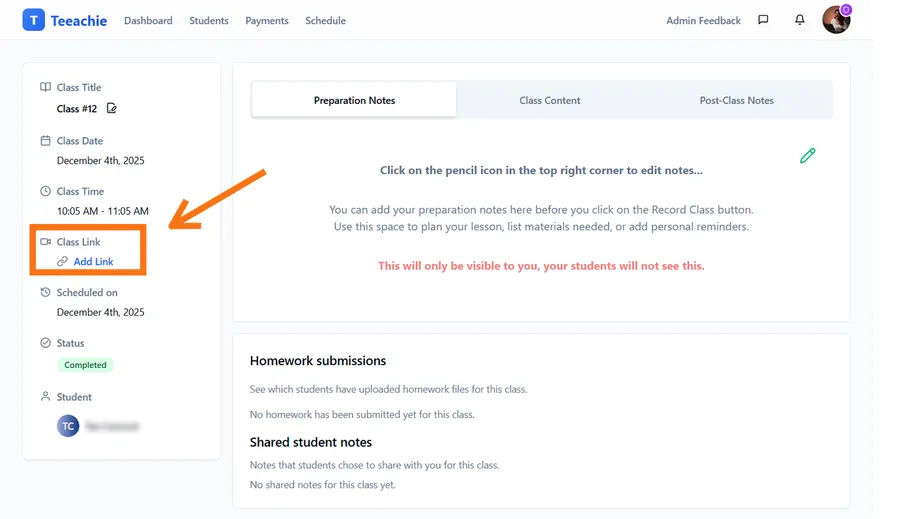
Your student will see this link when they view the class.
Tip: Set a default meeting link in Settings if you always use the same video room.
Scheduling for pending students
You can schedule classes for students who haven’t yet accepted their invitation:
- Create a class as normal
- Select the pending student from the dropdown (they’ll have a “Pending” badge)
- Schedule the class
The class will appear on their calendar as soon as they create their account.
What your student sees
When you schedule a class, your student:
- Sees the class on their dashboard and calendar
- Can view class details including the meeting link
- May see an in-app notification (bell icon) about the new class
Automatic conflict prevention
Teeachie automatically prevents double-booking. When you select a date, the time dropdown only shows available slots – times that conflict with existing classes are automatically hidden.
This means you’ll never accidentally:
- Double book yourself – Times with existing classes aren’t shown
- Schedule outside availability – Only your available hours appear
- Overlap with student’s classes – The student’s existing bookings are considered
Tip: If you don’t see the time you want, check if you have another class scheduled or if it’s outside your set availability hours.
Change a scheduled class
To change the time or date of a class:
- Click on the class in the calendar
- Choose Reschedule Class from the menu
- Select a new date and time
- Confirm the change
Your student sees the new time on their dashboard and may see an in-app notification about the change.
See also: Reschedule or cancel a class for more options.
Best practices
Schedule in advance
Give students notice by scheduling at least 24 hours ahead when possible.
Confirm with your student
Especially for new students, confirm the time works before scheduling.
Check timezones
Times show in your timezone. Make sure you and your student agree on the actual time.
Add meeting links promptly
Add your video link as soon as you schedule so students can find it easily.
Troubleshooting
Can’t see student in dropdown
- Check if the student is archived
- Verify they’re in your Students list
- Try searching by name or email
Wrong time displayed
- Verify your timezone in Settings
- Check if the calendar view is showing the correct day
Meeting link not saving
- Ensure the URL is valid (starts with http:// or https://)
- Try copying the full link again
- Check for extra spaces
What’s next?
- Reschedule or cancel a class – Make changes to bookings
- Record a class – Finish classes and deduct credits
- Add class materials – Prepare content for the session
Need help?
Having trouble scheduling? Contact support and we’ll help you out.