Add meeting links and materials to a class
Learn how to add video call links, upload lesson materials, and organize resources on class pages.
Add meeting links and materials to a class
Class pages are where you share everything students need for their lesson. This guide covers adding meeting links and uploading materials.
Add a meeting link
Students need to know where to join the video call. Add your meeting link:
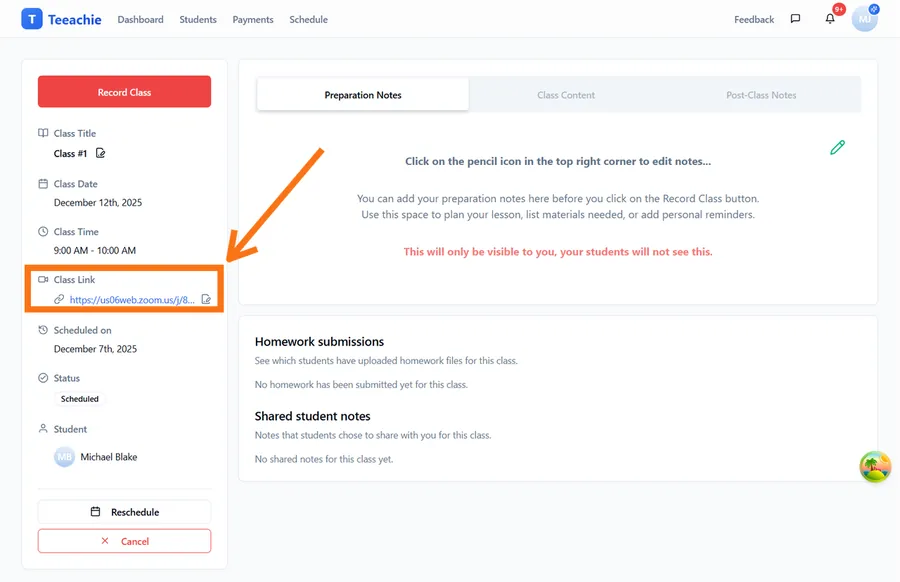
- Open the class page (from calendar or student profile)
- Find the Class Link section
- Click the edit icon to open the dialog
- Paste your video call URL (Zoom, Google Meet, etc.)
- Click Save
Supported platforms
Teeachie works with any video platform:
- Zoom
- Google Meet
- Microsoft Teams
- Any URL-based meeting service
When to add the link
- Ideal: 24 hours before class
- Minimum: Before the class starts
- Students can access the link from their dashboard
Tip: If you use the same link for all classes with a student, you can still add it to each class page for easy access.
Upload materials
Share lesson resources directly on the class page:
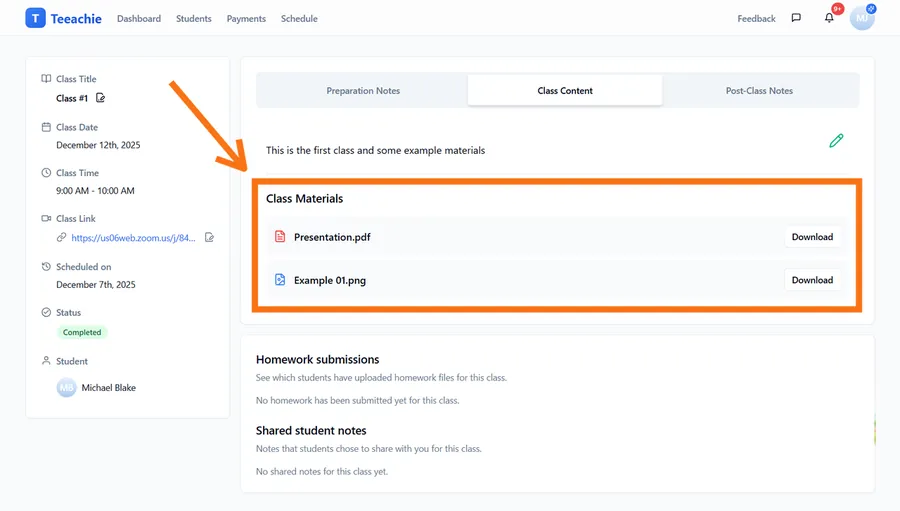
- Open the class page
- Go to the Class Content tab
- Find the Class Materials section
- Drag files into the drop zone, or click it to pick files from your computer
- Wait for upload to complete
- Files appear in the materials list
Supported file types
- Documents: PDF, DOC, DOCX
- Presentations: PPT, PPTX
- Spreadsheets: XLS, XLSX
- Images: PNG, JPG, GIF
- Audio: MP3, WAV
- Video: MP4 (check size limits)
File size limits
- Individual files: Up to 30MB each (per-file UI limit)
- Total materials per class: Up to 30MB combined (shared across all files)
- Maximum 15 files per class (subject to the 30MB total cap)
- For larger files, consider cloud links (Google Drive, Dropbox)
Organize materials
Keep materials easy to find:
Name files clearly
✅ Lesson-12-Vocabulary-List.pdf
❌ doc1.pdf
Group related files
Upload related materials together so they appear near each other.
Remove outdated files
Delete files that are no longer relevant to keep the page clean.
Add class notes
Document your lesson planning and outcomes:
Preparation notes
Before the class:
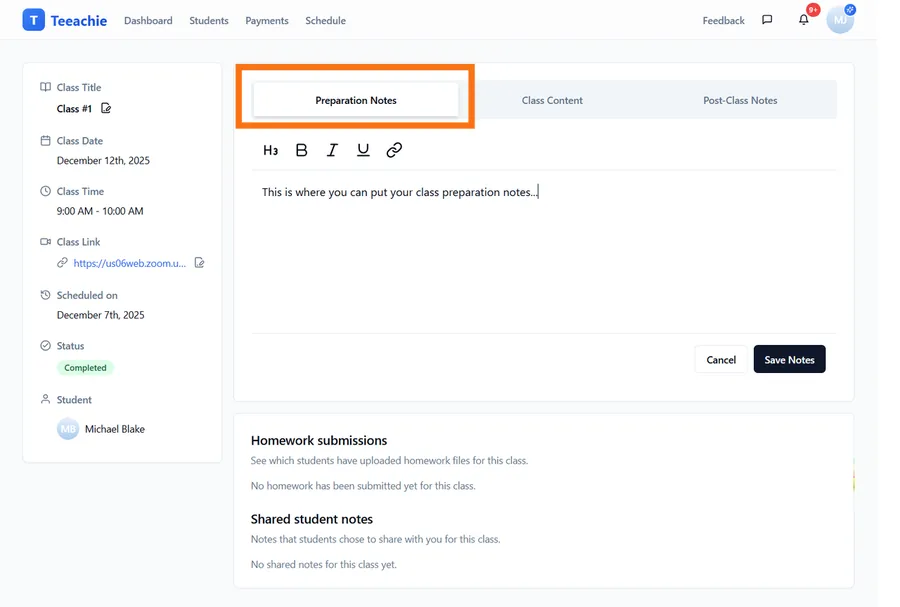
- Open the class page
- Go to the Preparation Notes section
- Click the pencil icon to edit
- Write your lesson plan in the editor
- Click Save Notes when done
Post-class notes
After the class:
- Open the class page
- Go to the Post-Class Notes section
- Click the pencil icon to edit
- Summarize what was covered
- Note areas for review
- Click Save Notes when done
What to include in notes
Preparation notes:
- Topics to cover
- Exercises to do
- Questions to ask
- Time allocation
Post-class notes:
- What was accomplished
- Student performance
- Areas needing review
- Ideas for next class
What students see
When you add content to a class page, students can access:
| Content | Visible to student? |
|---|---|
| Meeting link | ✅ Yes |
| Materials | ✅ Yes |
| Prep notes | ❌ No (teacher only) |
| Post-class notes | ❌ No (teacher only) |
Note: Your notes are private – students never see them. This lets you write candidly about the lesson.
Best practices
Add links early
Upload the meeting link well before class time so students can plan.
Upload materials before class
Students appreciate having materials to review beforehand.
Use consistent naming
Develop a naming convention: Week-01-Topic.pdf, Lesson-05-Exercises.docx
Keep it focused
Only upload materials relevant to that specific class.
Update after class
Add post-class notes while the lesson is fresh in your mind.
Troubleshooting
File won’t upload
- Check the file size (max 30MB per file, 30MB total per class)
- Verify you haven’t exceeded 15 files per class
- Try a different format
- Ensure you have a stable internet connection
Link doesn’t save
- Verify the URL format is correct
- Try copying the link directly from your video platform
- Refresh and try again
Student can’t see materials
- Ensure you clicked Save after uploading
- Check that the class is still scheduled (not cancelled)
- Ask the student to refresh their page
What’s next?
- View homework submissions – See what students submit
- Class pages overview – Understand class page features
- Complete a class – Finalize the session
Need help?
Issues with materials or meeting links? Contact support and we’ll assist you.