Record a class and deduct credits
Learn how to record classes, automatically deduct credits, and handle the recording workflow.
Record a class and deduct credits
After you’ve taught a class, recording it finalizes the session and handles credit deduction. This guide explains the recording workflow.
When to record a class
Record a class after you’ve finished teaching the session. You can record:
- Classes that just ended
- Past classes you forgot to record earlier
Record a class
- Click on the class in your calendar to open the class page
- Click the Record Class button
- The class status changes to “Completed”
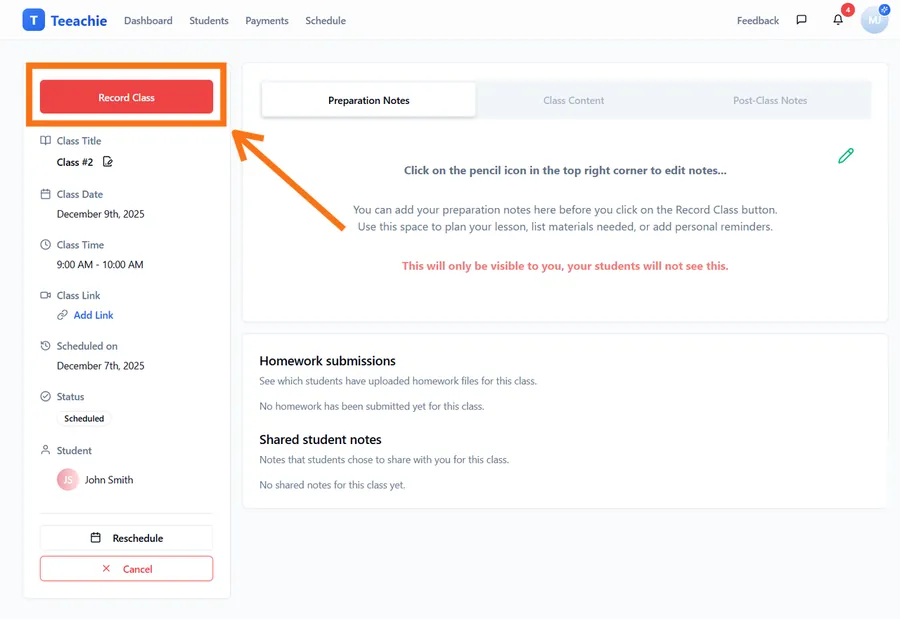
Credits are automatically deducted from the student’s balance.
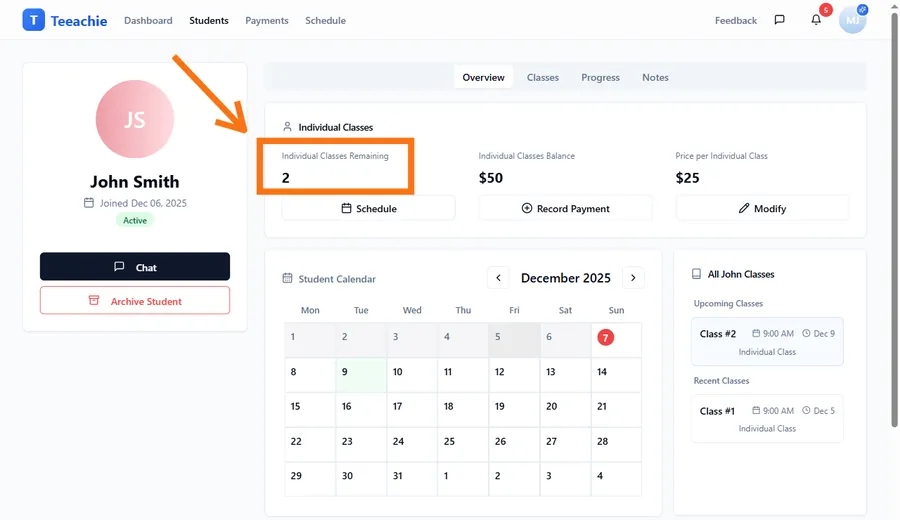
Automatic credit deduction
When you record a class, Teeachie automatically:
- Deducts one class credit from the student’s balance
- Updates the “classes remaining” count on their profile
- Records the class in the student’s history
What if the student has no credits?
If a student has 0 credits remaining, recording the class:
- Sets their balance to negative (-1, -2, etc.)
- Flags them for payment attention
- Doesn’t prevent recording – you can still teach
This negative balance indicates classes that haven’t been paid for yet.
Class statuses explained
| Status | Meaning |
|---|---|
| Scheduled | Upcoming class, not yet occurred |
| Pending Completion | Past scheduled class, awaiting your action |
| Completed | You marked it done, credits deducted |
| Cancelled | Class was cancelled before completion |
Pending Completion
Classes that are past their scheduled time but haven’t been marked completed show as “Pending Completion.” These appear in your Needs Attention queue in the Class Management Hub.
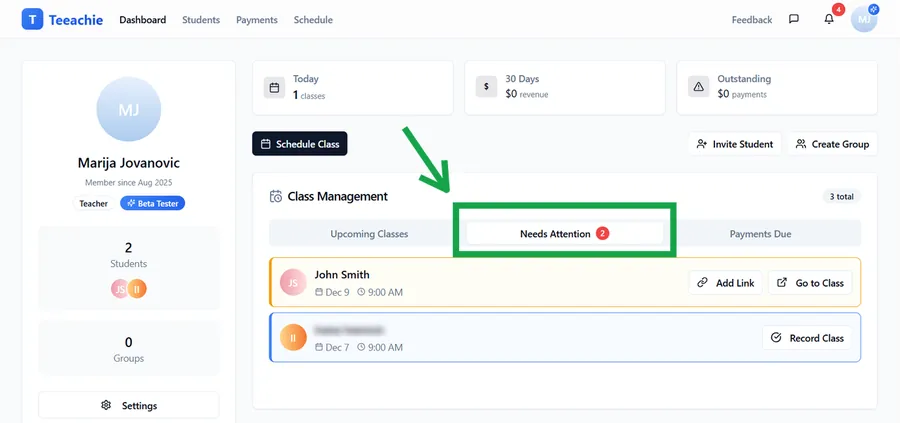
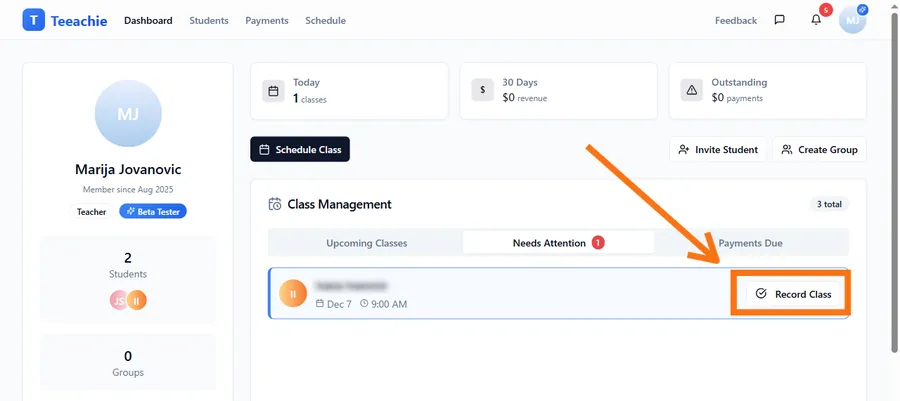
Find classes to record in the Class Management Hub
The Class Management Hub helps you find classes that need attention:
- Go to your Dashboard
- Find the Class Management Hub section
- Click the Needs Attention tab
- See all classes pending completion
- Click on a class to open its class page
- Record the class from there
The hub gives you a quick overview of which classes need recording.
Group class recording
For group classes, recording works slightly differently:
- Click on the group class in your calendar to open the class page
- Click Record Class
- Mark attendance for each student
- Confirm recording
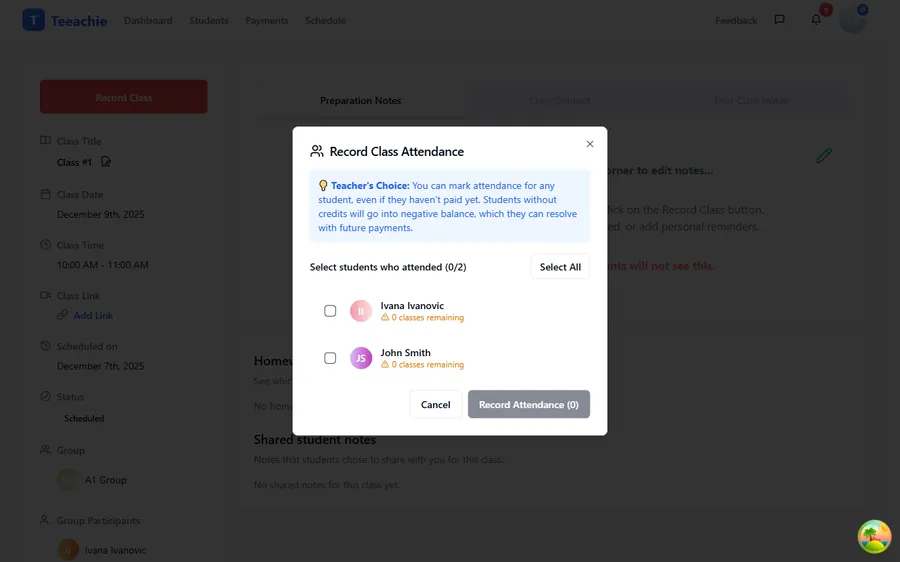
Only students marked as “attended” have sessions deducted from their group enrollment. Absent students keep their sessions.
Best practices
Record classes promptly
Record classes soon after teaching them. This keeps your records accurate and helps students track their progress.
Check pending classes regularly
Review the “Needs Attention” section weekly to ensure no classes are left unrecorded.
Verify credit balance
Before recording, glance at the student’s credit balance. If they’re low, it’s a good time to discuss payment.
Use the hub for batching
If you have multiple classes to record, the Class Management Hub is faster than clicking through the calendar.
Troubleshooting
Credits didn’t deduct
- Refresh the page and check the student’s profile
- Verify the class status shows “Completed”
- Contact support if credits still show incorrectly
Recorded the wrong class
Contact support for help correcting the class status and restoring credits.
Student disputes the recording
Discuss with the student. If a mistake was made, you can:
- Manually adjust their credits on their profile
- Contact support for assistance with the class status
What’s next?
- Record payments – Accept payment for classes
- View payment history – Track revenue
- Reschedule a class – Change upcoming bookings
Need help?
Questions about recording classes? Contact support and we’ll help.