Create a group and add students
Learn how to create student groups for group classes and add your existing students as members.
Create a group and add students
Groups let you organize students who take classes together. This guide covers creating groups and managing membership.
When to use groups
Create a group when you have:
- Multiple students taking the same class together
- A course or program with multiple participants
- Students who benefit from learning with others
Create a new group
- Go to Students from the top navigation
- Scroll down to the My Groups section
- Click Create New Group
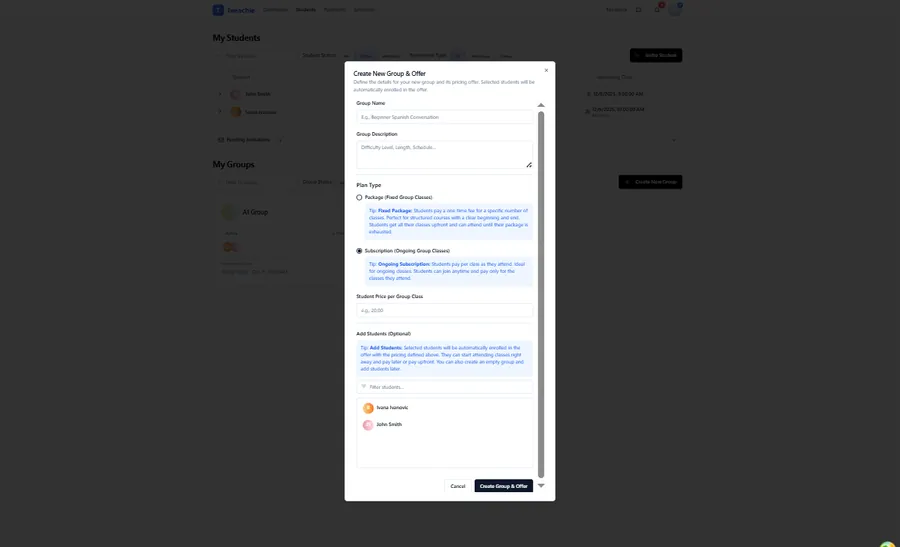
- Fill in the group details:
- Group name – A descriptive name (e.g., “Intermediate Spanish - Tuesday”). Consider including the language in the name.
- Description (optional) – Additional details about the group
- Plan type – Package (fixed sessions) or Subscription (ongoing)
- Pricing fields – Package price, price per class, number of classes
- Click Create
Note: When creating a group, you also configure the initial billing plan (offer). See Group pricing explained for details.
Add students to the group
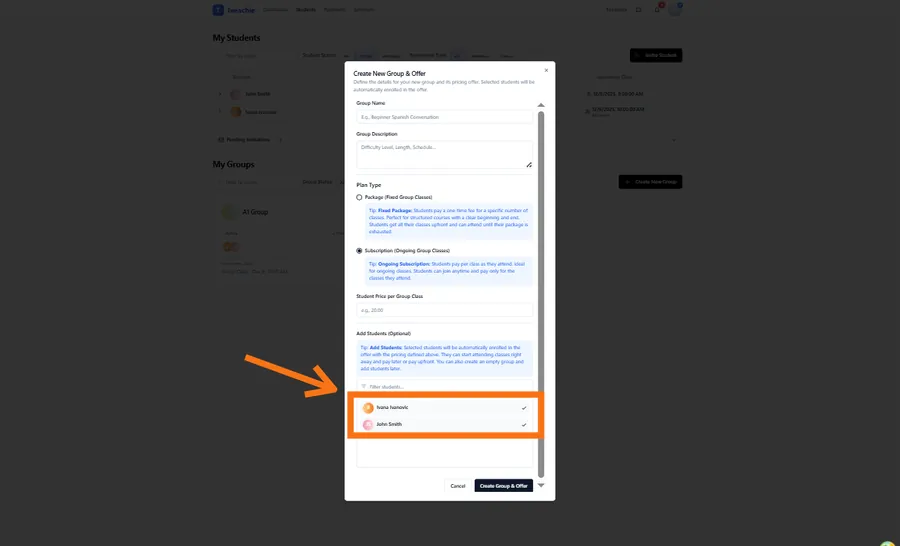
After creating a group, add your existing students:
- Open the group profile (click on the group)
- Click the Manage Group button
- Select students from your student list using the checkboxes
- Click Save Changes
Who can be added?
- Only your existing students can be added to groups
- Students must have an active connection with you
- Each student can be in multiple groups
Note: If you need to add someone who isn’t your student yet, first add them as a student, then add them to the group.
Group member list
Once members are added, you’ll see them in the group profile:
- Member name and avatar
- Enrollment status (if offers are set up)
- Sessions remaining (for enrolled members)

Group settings
You can edit group details and manage the group’s status:
- Edit group name and description
- Archive the group when it’s no longer active
- Unarchive if you want to resume using it
Remove a member
To remove a student from a group:
- Open the group profile
- Click the Manage Group button
- Uncheck the student you want to remove
- Click Save
Note: Removing a member cancels their enrollment but doesn’t delete their enrollment history or affect their individual student profile.
Best practices
Name groups clearly
Use descriptive names that help you quickly identify the group:
- Include the level: “Beginner French”
- Include the schedule: “Advanced English - MWF”
- Include the cohort: “Spanish Spring 2025”
Keep groups focused
Create separate groups for different levels or schedules rather than mixing everyone together.
Set up billing early
Before scheduling classes, set up group offers so enrollments are ready.
What’s next?
- Understand group pricing – Learn about packages vs subscriptions
- Set up group offers – Create billing plans for your group
- Schedule group classes – Book sessions for the group
Need help?
Questions about creating groups? Contact support and we’ll help.