Schedule and manage group classes
Learn how to schedule group class sessions and manage the group's class calendar.
Schedule and manage group classes
Group classes work similarly to individual classes but involve multiple students. This guide covers scheduling and managing group sessions.
Schedule a group class
From the Dashboard
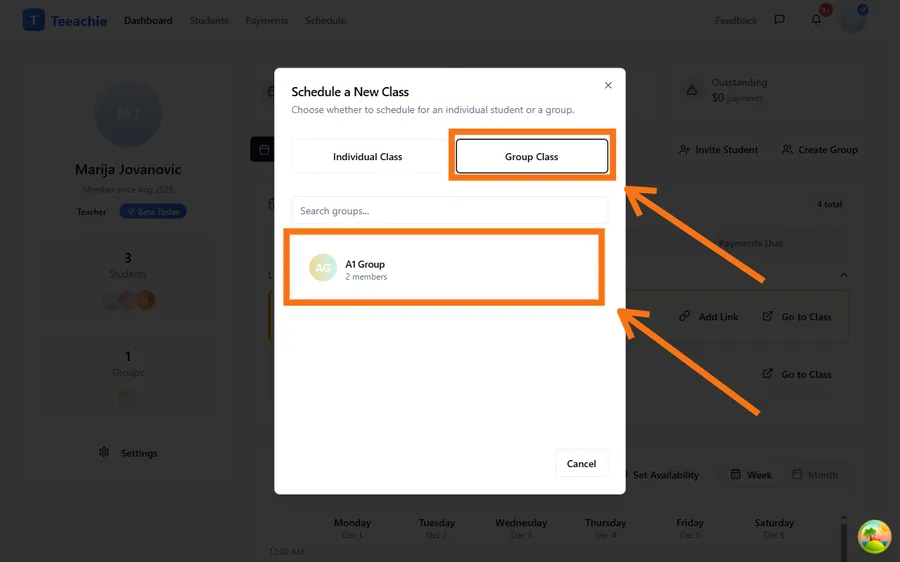
- Click the Schedule Class button in the Quick Actions toolbar
- In the dialog, toggle to Group Class
- Choose the group
- Select the date and time from the calendar inside the dialog
- Set the duration
- Click Schedule
From the group profile
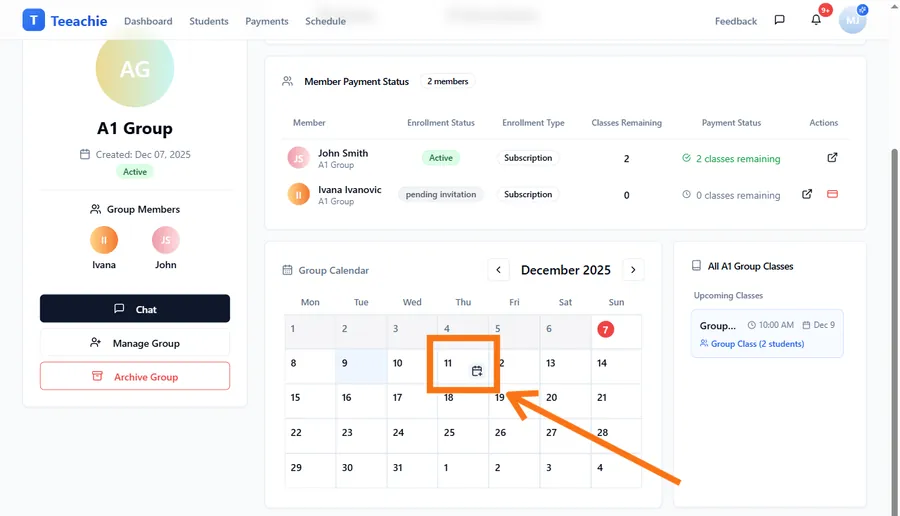
- Open the group profile
- Find the Group Calendar section
- Hover over the day you want and click the + icon that appears
- Set the time and duration
- Click Schedule
Group class on the calendar
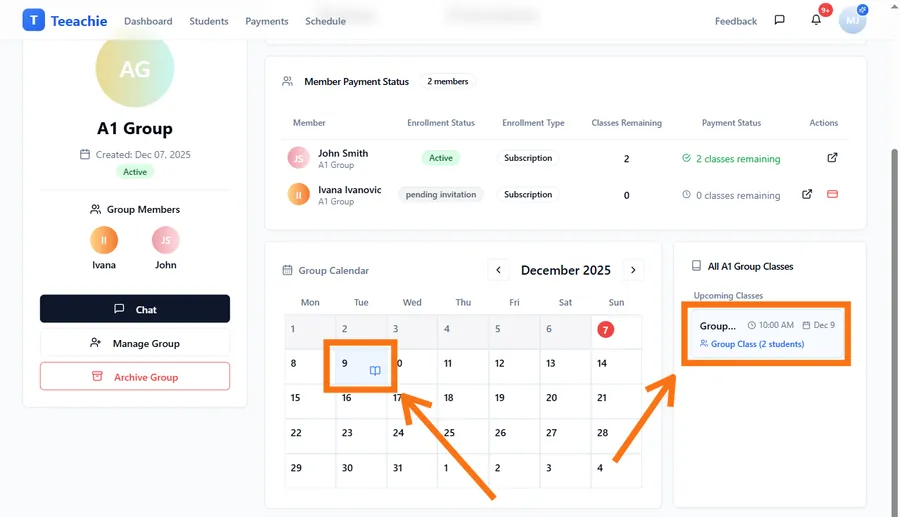
Group classes appear on the group calendar with distinct coloring. When you view the class list or selection dialog, you’ll see:
- Group name displayed
- Student count (e.g., “Group Class (4 students)”)
Class page for groups
Each group class has a class page where you can:
- Add meeting link for video calls
- Upload materials (slides, handouts)
- Write class notes
- Record attendance via the Record Class button (attendance then feeds into each student’s enrollment)
To access:
- Click on the group class in your calendar
- Click View Class Page (or Open)
Add meeting link
Before the class:
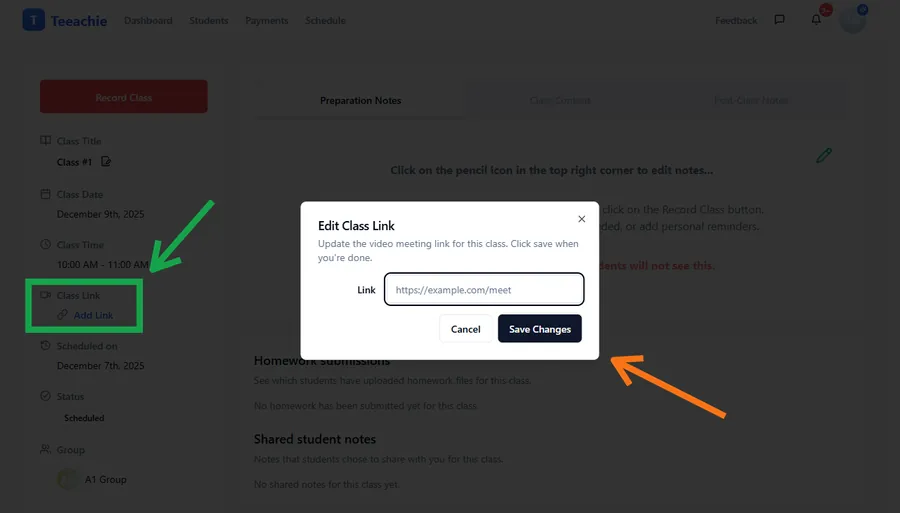
- Open the group class
- Find the Meeting Link field
- Paste your video call link (Zoom, Google Meet, etc.)
- Save
All group members will see this link when they view the class.
Reschedule a group class
To move a group class to a different time:
- Click on the group class in your calendar
- Click Reschedule
- Select the new date and time
- Confirm
All group members are notified of the change.
Note: Rescheduling is done through the Reschedule dialog; there is no drag-and-drop for group classes.
Cancel a group class
- Click on the group class
- Click Cancel Class
- Choose whether to charge students (for late cancellations)
- Confirm
Cancellation options:
- Don’t charge – No sessions deducted (you cancelled)
- Charge students – Sessions deducted (no-show or late cancel by students)
Note: The charging option applies to the group as a whole. Individual attendance can be handled separately.
View group class history
To see past group classes:
- Open the group profile
- Go to the Classes or History tab
- Browse past sessions
You’ll see:
- Class dates and times
- Attendance records
- Linked class pages
Best practices
Schedule regularly
If your group meets weekly, schedule sessions in advance so students can plan.
Add meeting links early
Share the video call link at least a day before so students are prepared.
Use class pages
Upload materials before class and add notes after – this creates a valuable record for students.
Track the schedule
Review your group’s schedule regularly to avoid conflicts with individual sessions.
What’s next?
- Track attendance – Mark who attended each class
- Add class materials – Upload content for your group
- Complete a class – Finalize and deduct sessions
Need help?
Questions about group scheduling? Contact support and we’ll help.